Application Overview
Explore the main screens of the application: Home, Demo, Files, Settings and many more.
Home Page
Home Page
< HomePage >The application's home page displays the ‘Start a test’ button, which lets you start testing as soon as a crisis occurs. The date of the last test is also displayed.
This button is also available via a widget for even faster access: the test can be launched immediately, to capture the first few seconds of the crisis, which are often the most valuable for analysis.

Demo Page

Demo Page
< DemoPage >The Demo page guides users through the use of the 'Start a test' functionality. It allows users to familiarize themselves with the application beforehand, in a calm environment.
It explains step by step how a crisis test runs, how to move from one test to another, how to end the test and how to validate the saving of the files.
The aim is to make the application simple and intuitive to use, even in a stressful situation.
Files Page
File Page
< FilePage >This Files page is divided into three sections:
- Questionnaire : contains the post-crisis questionnaires completed after each testing session.
- Instructions : displays the testing instructions defined for each crisis, together with their timestamps.
- Videos : contains all the videos recorded during the tests.
Each file linked to a crisis is named with the corresponding date and time, making it easy to find the right file.
All documents (PDFs, videos, etc.) are stored locally on the device, ensuring that they are always accessible, even without an internet connection, and can be consulted at the click of a button.

Settings Page

Settings Page
< SettingsPage >The Settings page has four main sections:
- Manage authorizations : activate or deactivate the permissions required by the application, such as camera, microphone, local storage, etc.
- Log out of the application.
- Modify test configurations : to be defined with the neurologist, this section allows you to customize the tests carried out during a seizure, according to the patient's needs.
- Modify the post-crisis questionnaire : also set by the neurologist, this allows you to adapt the questions asked after the seizure, to capture the patient's feelings and observations.
Finally, this is where you can choose the default camera (front or rear), depending on whether you want to opt for a self-test or a hetero-test.
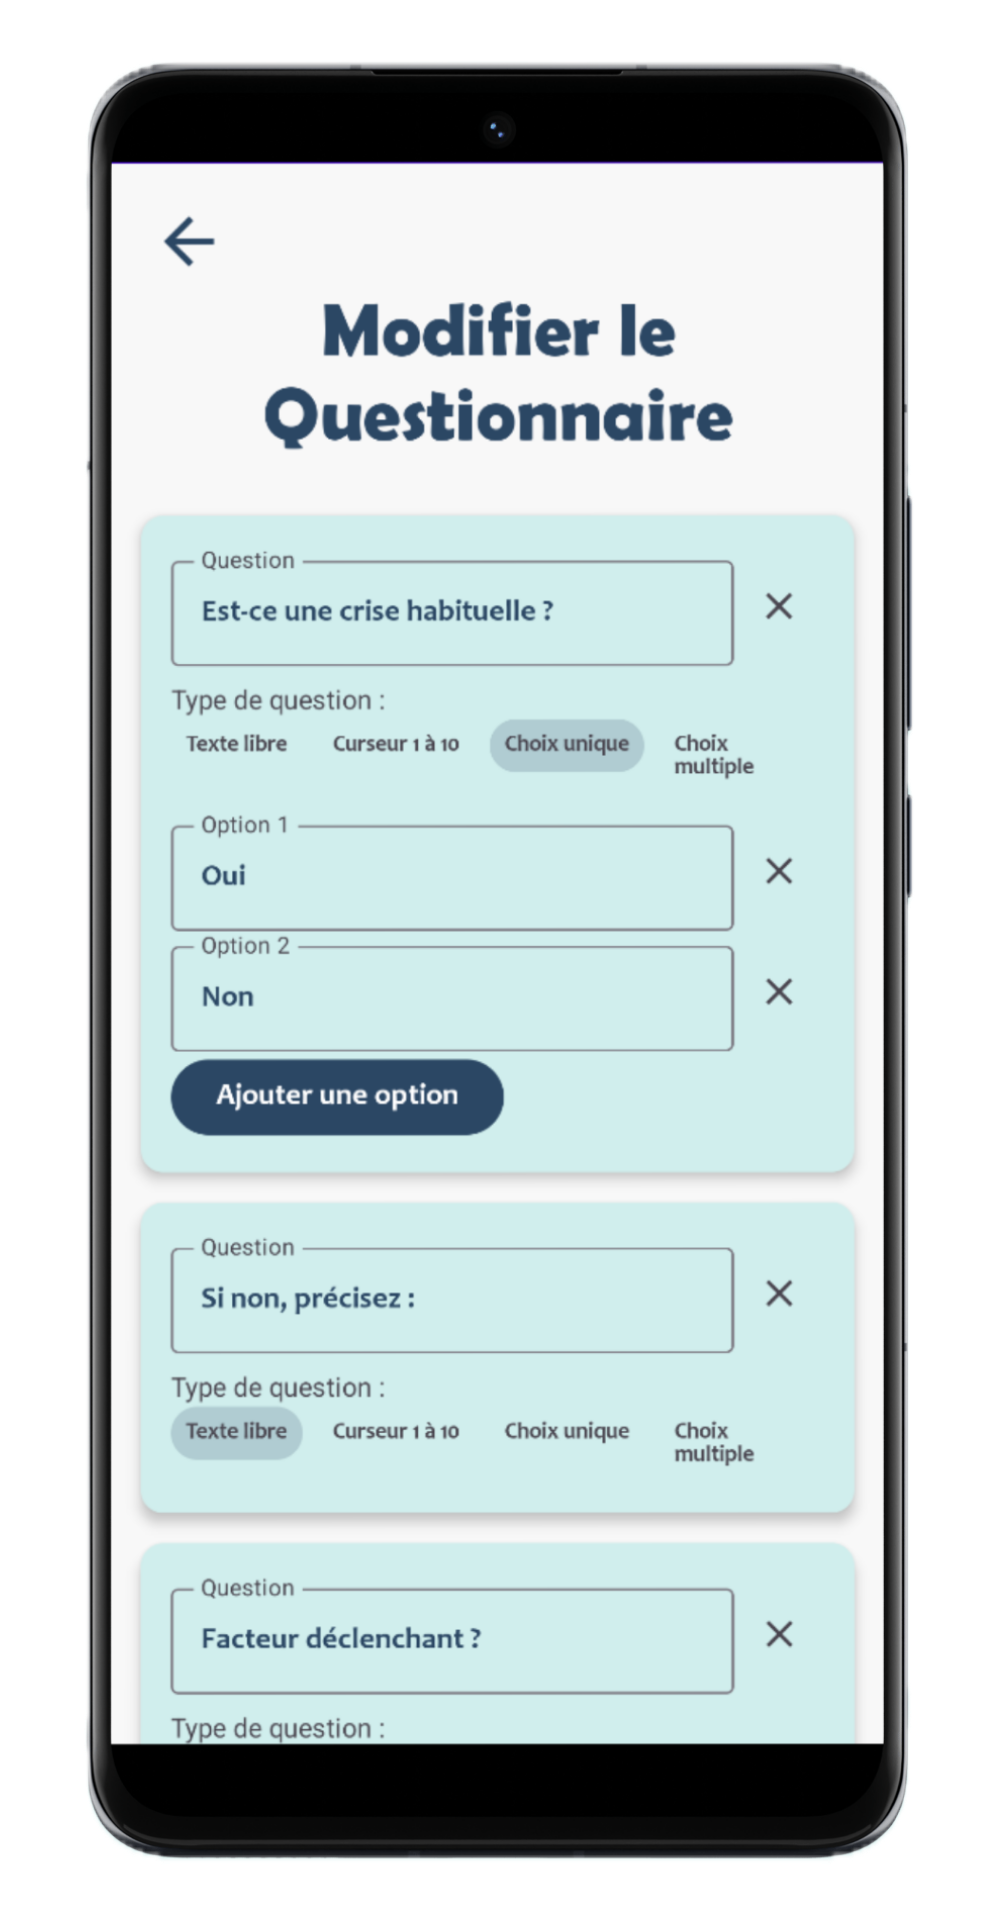
Configuration questionnaire
Configuration Questionnaire
< QuestionnaireScreen >On this page, users can customise the questions that will be asked at the end of a crisis, as part of the post-crisis questionnaire.
Several types of responses are available : free text, yes/no, multiple choice, cursor, etc.
The configuration should be carried out with the help of the neurologist, to ensure that the information collected is relevant and useful for the patient's follow-up.
Profile Page
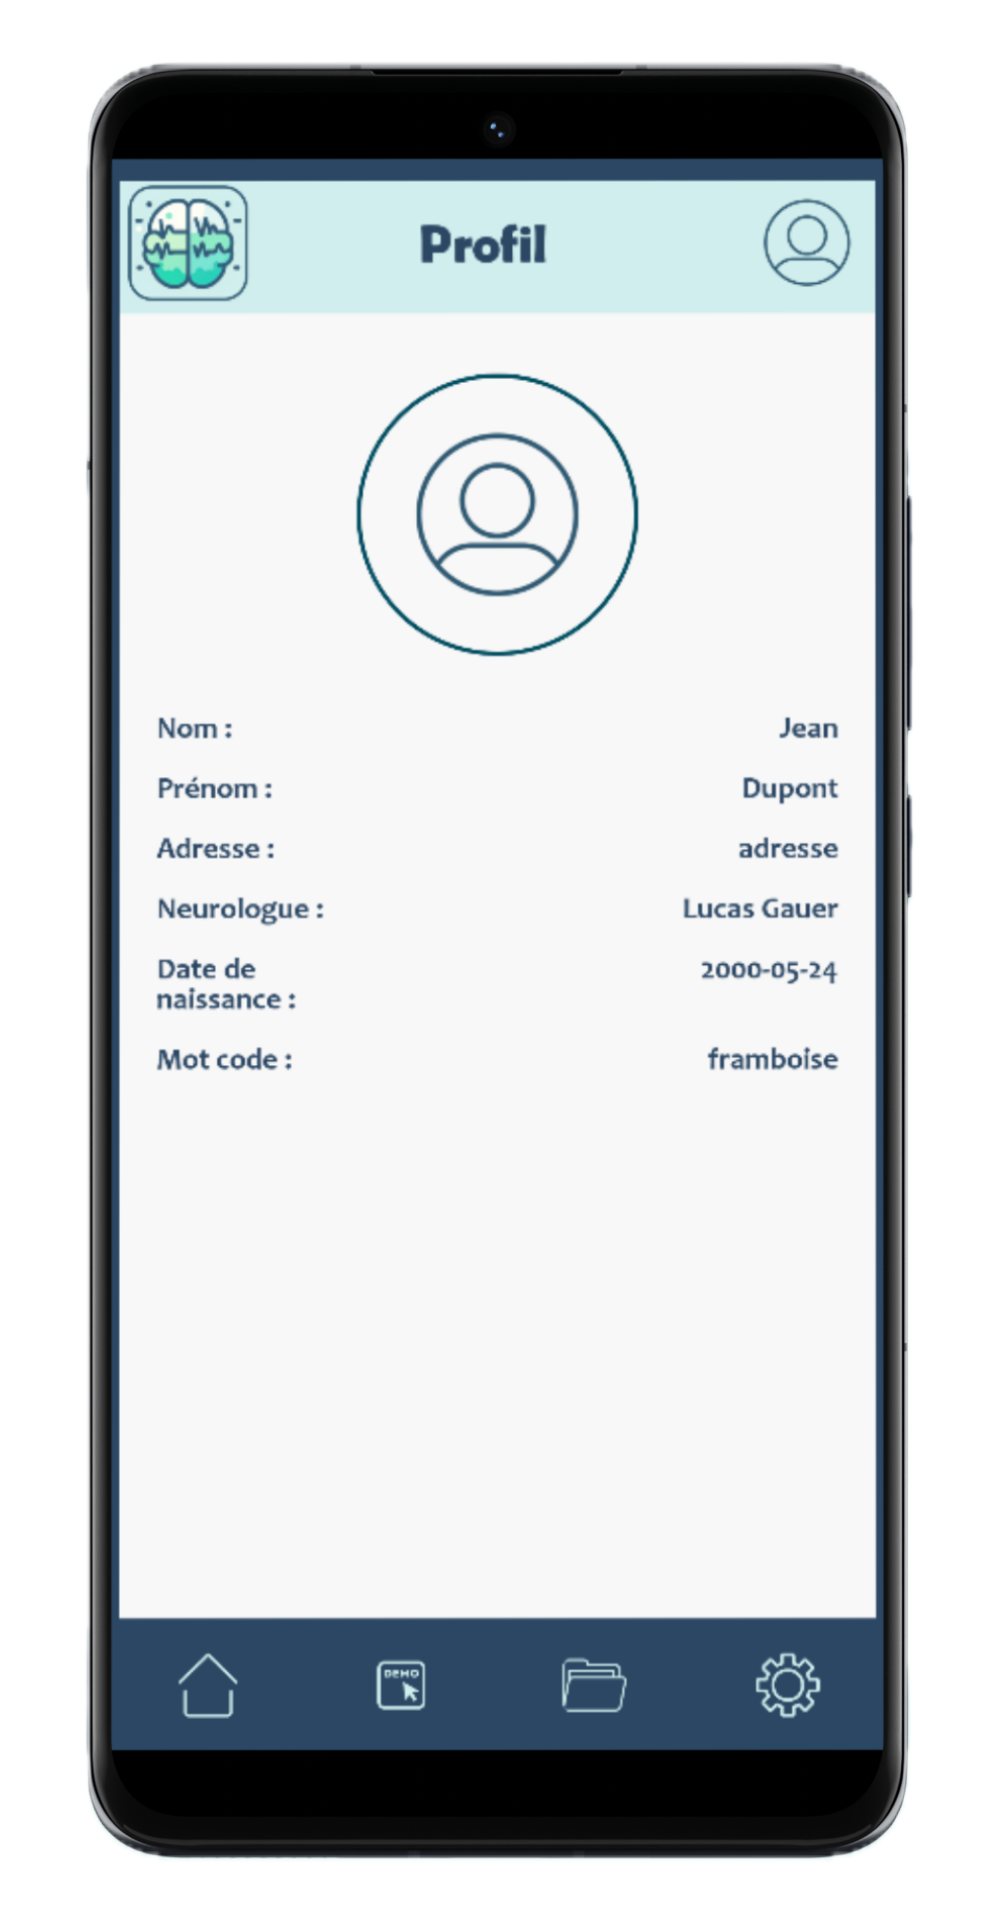
Profile Page
< ProfilePage >This page contains patient information, in particular the patient's code word. The code word, which is unique to each patient and defined by the neurologist with the patient, is requested at the start of each test triggered during a crisis.
On this page, you can also view the patient's personal information registered at the sign-up stage.
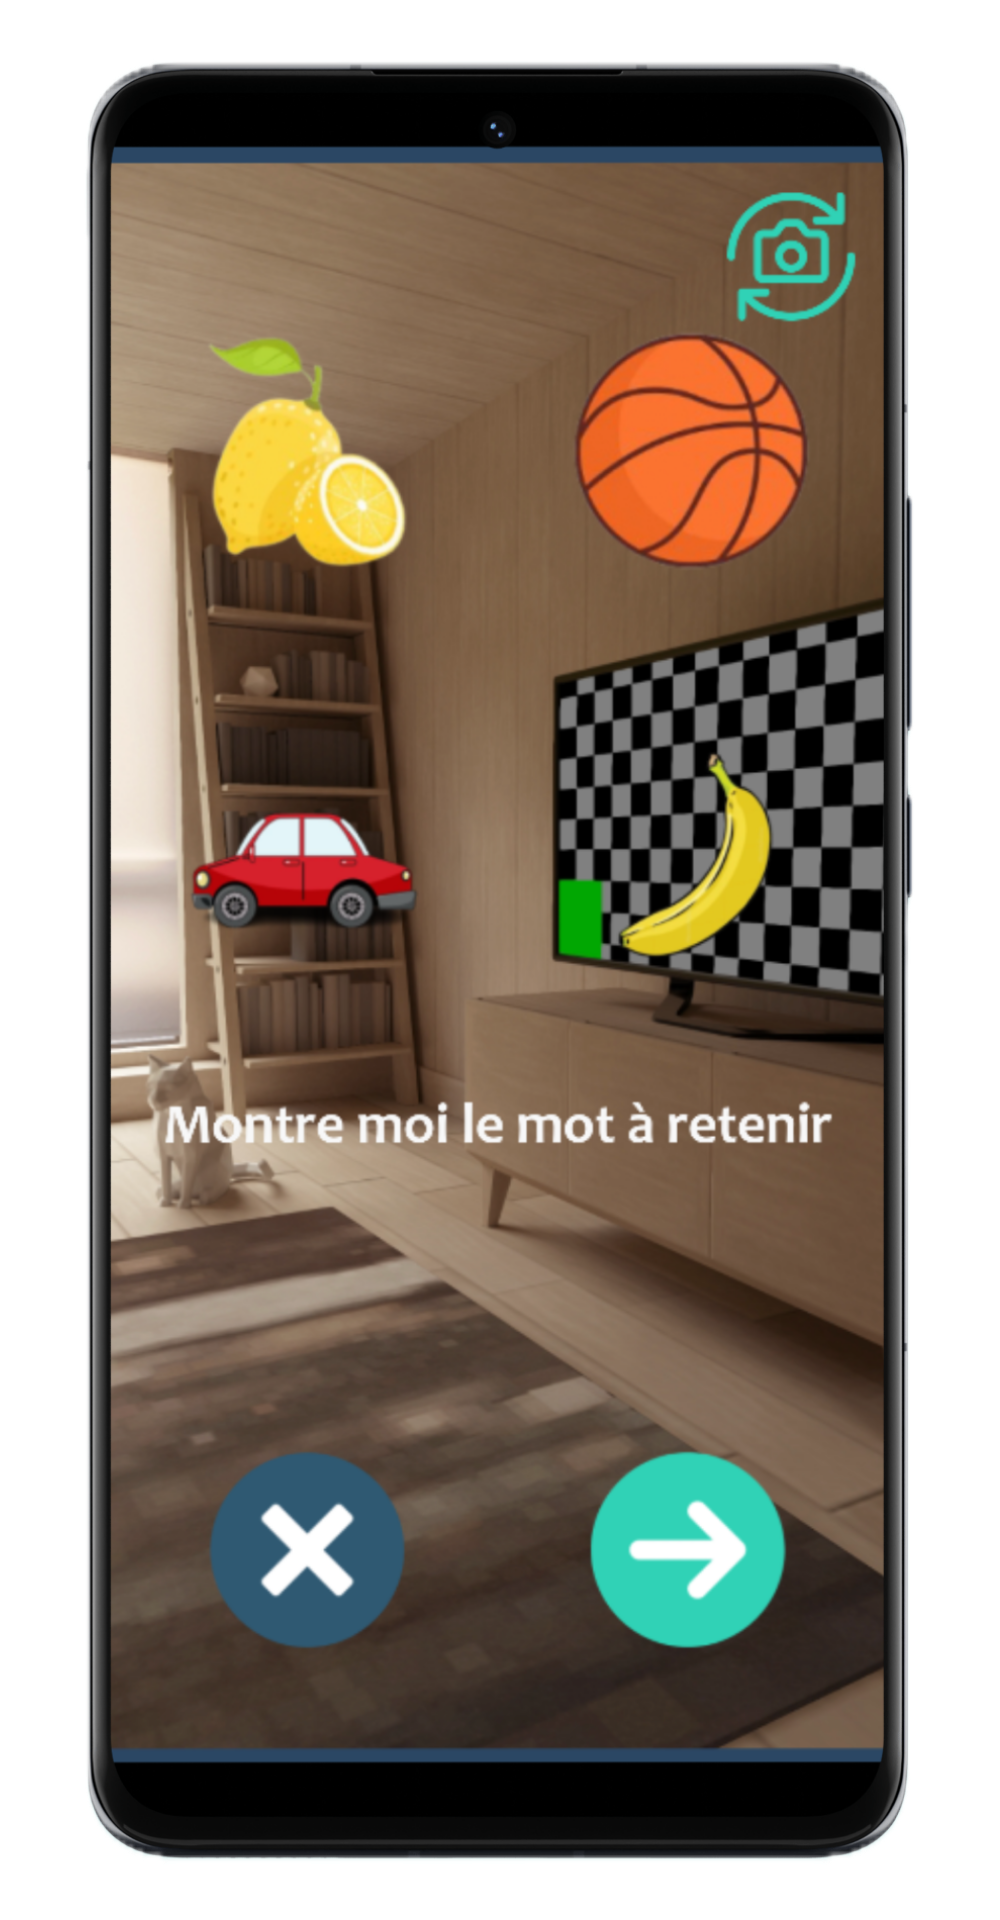
Test Screen
Test Page
< TestScreen >The Test page is where a crisis test is started, either by the patient or a relative. After clicking ‘Start a test’ (also available via the widget), the app guides users through pre-set instructions (test configuration), records video and audio, and allows switching between front and rear cameras.
Instructions can be read aloud if auto mode is enabled. Users can skip steps or end the test at any time, with confirmation required to finish.
At the end, a post-crisis questionnaire appears to collect feedback. If needed, it can be completed later from the Home Page.
For a better understanding of the navigation through the pages, please refer to the Navigation Page.